 |
|
|
|
| How to Change DigiDudes' head? |
|
| How it works: |
| A |
Choose desired image and Enter Face Creator. |
| B |
Choose any DigiDude and edit the Pivots. |
| C |
Change color of the limbs. |
| D |
Go back to Stage and save! |
|
|
|
|
|
For more details, please follow the step-by-step instructions below. |
|
|
| A. Choose desired image and Enter to Face Creator. |
| You can use the image on the internet, or take a photo by yourself. |
| |
| A-1 |
Choose an image that you want and edit the image in 2D Software (eg. Photoshop). |
| |
|
| |
| A-2 |
Click the Face Creator button, and import the image. |
| |
|
| |
| A-3 |
Follow the step-by-step description in the Image Processing to finish it. |
| |
 |
| |
|
| |
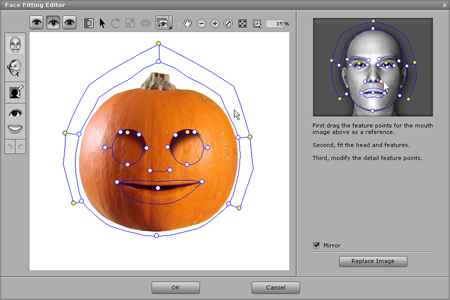
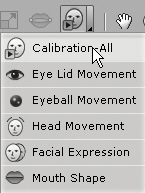
Tip. You can check the finished result by Face Calibration in Face Fitting. |
| |
 |
| |
|
| A-4 |
Click Add in Actor/Head/Content Manager to save it. |
| |
|
|
|
|
| B. Choose any DigiDude and edit the Pivots. |
| Choose a DigiDude whose color is closest to the head that you just saved. |
| |
| B-1 |
Apply Crayon Dude in Actor/Character, and click the Character Composer button. |
| |
|
| |
| B-2 |
Apply the Pumkin head that you saved just a moment ago. |
| |
|
| |
| B-3 |
Adjust the Pivots of Nectk/Upper/Lower Torso to match with Pumpkin head, and you can also fine tune the pivot according to the Puppet result that you want. |
| |
| B-4 |
Delete the Upper/Lower Torso that you don't need After you finished adjusting the pivots in Scene Manger/Layer. |
| |
|
| |
| B-5 |
Adjust the pivots of limbs according to their relative position to the Head and adjust the size of limbs. |
| |
|
|
 |
|
| C. Change color of the limbs. |
| |
| C-1 |
Select Left Hand and click the Color Editor button. |
| |
|
| |
| C-2 |
Make sure Affect All is not checked, and drag the Hue Slider. |
| |
|
| |
| C-3 |
Repeat G-1 and G-2 for the rest of the body parts. |
| |
|
 |
|
| D. Back to Stage and save! |
| |
| D-1 |
Click Back to Stage and select Yes. |
| |
|
| |
| D-2 |
Save as new Avator in Actor/Character. |
| |
|
|
|
|