| To create and view slide presentations
enhanced with multimedia using TalkingSlide, it is necessary
that your system include the following components:
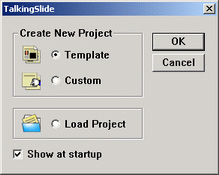
1. After opening the TalkingSlide application,
In the dialog box shown, click the Template option to use
one of the pre-designed templates.
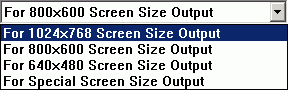
2. From the drop-down menu, select the
desired output screen size.
3. From the options provided, select the
desired template style.
4. From the options provided, select the
desired slide layout.

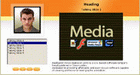
5. Type in a title in the Heading Text
box.

6. Click the session folder in the project
tree pane to display the session contents.
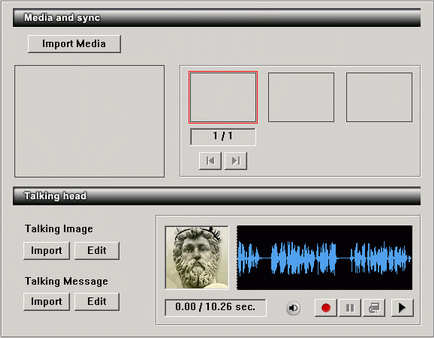
7. Click Import Media or the Import button
on the toolbar repeatedly to import image or multimedia
files into the session.
 or
or 
Use the Previous image and Next Image
buttons to navigate between the slides.


8. Click Import to import a Talking Image
and a Talking Message.

Alternatively click Record to record your
own message.

9. Click the slide icons to edit individual
slides. You can change the subtopic text, insert a different
media file, set a transition effect and change the slide
transition delay as desired.

10. Use Add, Del, Up and Down to add, delete
or move slides as required.


11. Click Preview to view your slide show.

12. Click Save or Export to save your
slide show for later use.


|