Including Visibility in Perform Command
MotionPlus also supports the visibility states of characters and the
accessories that are attached to the character. By passing MotionPlus
with visibility states to 3DXchange, you are able to add more perform
commands for the character which will show/hide various parts and/or accessories at a desired time.
Character's Visibility States in Perform Command
Preparing Data in iClone
-
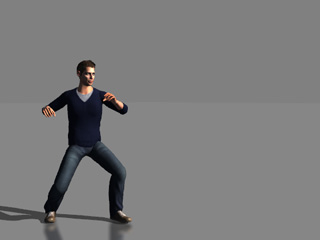
In iClone, apply a character.
-
Optionally apply motions to the character.
-
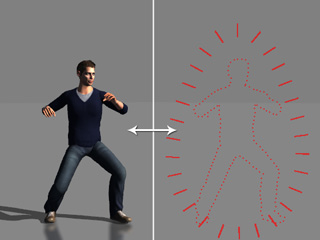
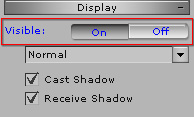
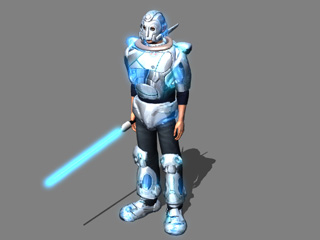
Turn the visibility of the character on and off in different time by clicking the Visibility On/Off buttons
in the Actor >> Avatar >> Modify Panel >> Display section.
|

|
|
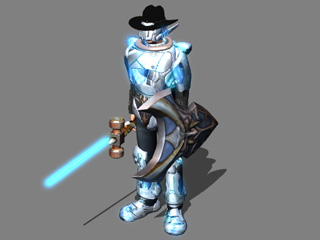
This character flashing show at certain time
by the visible switches.
|
-
This character will appear and disappear as if it's flashing.
-
Repeat the steps at another time frame to create a flashing hide effect on the character.

Sending Data from iClone to 3DXchange
-
In iClone, select the character and click the
Edit in 3DXchange button in the Modify Panel.
The character will be sent to 3DXchange instantly.
-
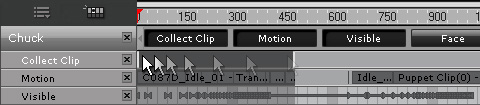
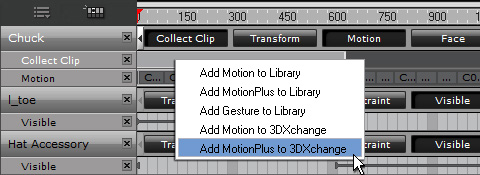
Open the Collect Clip track of the character and make a range for
the first part (flashing show).
-
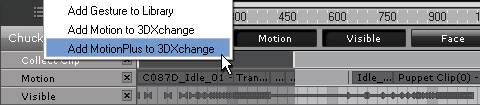
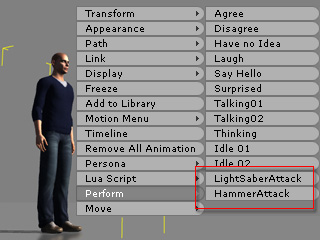
Right click within the range the select the Add MotionPlus to 3DXchange from the menu.
-
Repeat the same steps to the range where the character is flashing and create another MotionPlus file.

-
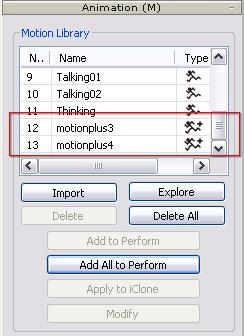
Go to 3DXchange, in the Motion Library, you will see two more items
appended to the end of the original
ones that the character has by default.
-
Add these MotionPlus clips into the Perform Editor. This
step ensures these two clips are appended to the Perform list in the right-click menu of the
character.
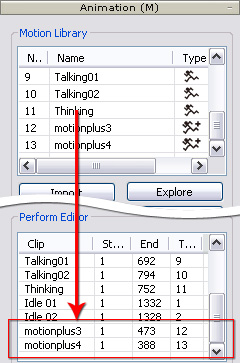
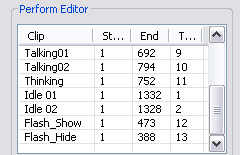
(Optional) Double click on the Clip cell of the clip to rename them.
-
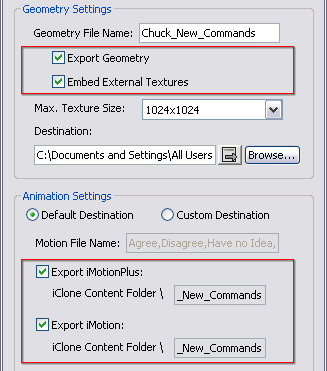
Export (Ctrl + E) the character to iClone. Make sure you include both the
character and the MotionPlus clilps.
Using New Perform Commands
-
Back to iClone.
-
Apply the new character that has just been exported.
-
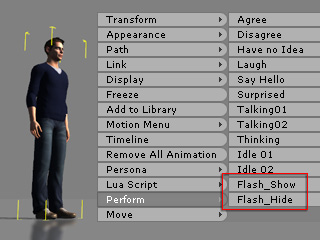
You will find the new commands listed in the Perform entry.
-
Utilize the new commands to create the flashing effect for the character.
Accessory Visibility States in the Perform Menu
Because MotionPlus also supports the visibility of accessories, you
can have the character wear different accessories at various times
by using the Perform commands.
Preparing Data in iClone
-
In iClone, apply a character.
Attach various accessories to the character.
-
Apply different motions to the character.

-
Hide unwanted accessories for a series of motions by pressing down the On / Off
buttons in the Actor >> Accessory >> Modify Panel >> Display section.
|
|
|
|
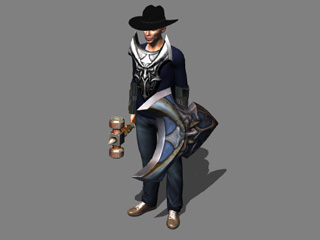
The unwanted accessories for the specific series of
motions are hidden.
|
-
Go to the time frame where the other series of motions starts.
-
Hide accessories for this series of motions.
Sending Data from iClone to 3DXchange
-
In iClone, select the character and click the
Edit in 3DXchange button in the Modify Panel.
The character will be sent to 3DXchange instantly.
-
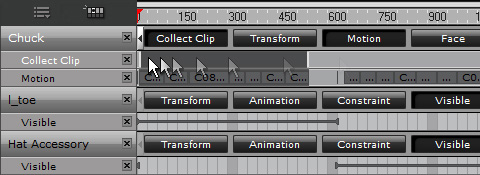
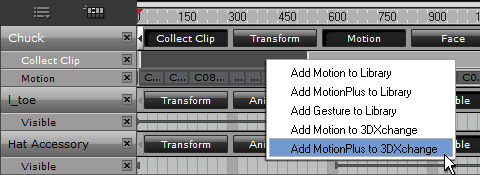
Open the Collect Clip track of the character, the accessories
and then make a range for the first series of motions
(because the accessory are numerous, a few accessories are shown
in the illustration below).
-
Right click within the range the select the Add MotionPlus to 3DXchange from the menu.
|
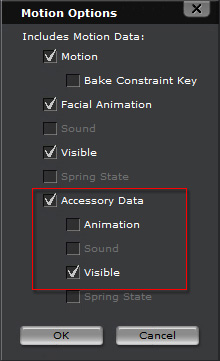
Note:
|
-
You may choose the Add MotionPlus to Library
command in the menu. However, you need to manually
load the MotionPlus file into 3DXchange later
on if you choose to do so.
-
If you determine to save the MotionPlus file to a destination folder,
then remember to activate the Accessory Data >>
Visible boxes in the MotionPlus Option panel.
|
-
Repeat the same steps to the range for the other series of motions with
different accessories shown.
-
Go to 3DXchange, in the Motion Library, you will see two more items
appended to the end of the original
ones that the character has by default.
-
Add these MotionPlus clips into the Perform Editor. This
step ensures these two clips are appended to the Perform list in the right-click menu of the
character.
(Optional) Double click on the Clip cell of the clip to rename them.
-
Export (Ctrl + E) the character to iClone. Make sure you include both the
character and the MotionPlus clilps.
Using New Perform Commands
-
Back to iClone.
-
Apply the new character that has just been exported.
-
You will find the new commands listed in the Perform menu.
-
Utilize the new commands to have the character change accessories
according to different scenarios.