 tool and drag a point to move it or drag on a contour (ex. the mouth contour) to
move the group of points.
tool and drag a point to move it or drag on a contour (ex. the mouth contour) to
move the group of points.
Adjust the eye, nose, mouth and eyebrow points to exactly match your imported picture.

Select the Pan
tool and drag a point to move it or drag on a contour (ex. the mouth contour) to
move the group of points.
Select the Zoom  tool and drag on a contour to scale the group of points.
Check the Mirror  option to adjust the points symmetrically, uncheck it to switch to independent
point adjustment. The default setting is on.
option to adjust the points symmetrically, uncheck it to switch to independent
point adjustment. The default setting is on.
Use the Dropper  tool to pick the middle tone of the skin color. iClone samples the skin tone
automatically for matching the skin color. Check how the front photo blends with
the profile image, if the skin tone does not match properly (this could happen
when the face is covered by something or the contrast of the photo is too high), you can pick the middle skin color manually and check the 3D head to get a
better result.
tool to pick the middle tone of the skin color. iClone samples the skin tone
automatically for matching the skin color. Check how the front photo blends with
the profile image, if the skin tone does not match properly (this could happen
when the face is covered by something or the contrast of the photo is too high), you can pick the middle skin color manually and check the 3D head to get a
better result.
When the features and contours on the front
of the face are properly set, click the Edit Side
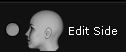 button to set the profile if necessary.

Move the points or the group of points the same way as front. Drag the 2 vertical lines to define the texture blend area and check the result on the 3D head.
You can import your own profile photo by clicking the Open Image  button.
Click the OK  button when you are happy with
your settings.
button when you are happy with
your settings.
When the following dialog box appears, click the OK button to apply the changes.

Give the 3D head a name and save it in the default facial folder. The new head you have created is automatically applied to the current project.
You have now created a 3D head that can be applied to any new project by
double-clicking it. The new head you have created can be found in the list of
custom faces. To find a custom face, click the  tab to begin facial settings and click the Custom tab to display the list
of custom heads.
tab to begin facial settings and click the Custom tab to display the list
of custom heads.