Batch Motion Conversion - Motions from Different Sources or with Different Structures
In the Batch Motion Conversion - Basic section, you can
convert motions from the same 3D source tools and in the same format. You are able to
mix motion files from different 3D tools, with different formats, and then convert
them.
|
Supported File Format
|
.BVH
.FBX (with human motions)
|
Step 1: Preparation before Conversion
Before converting multiple human motions, you first need to set the environment to one that is able to load
motions.
-
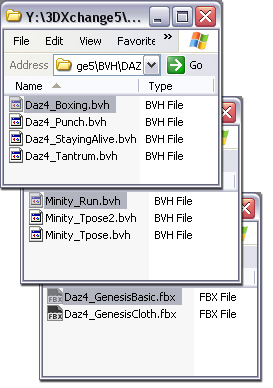
Prepare motion files from different 3D tools with different formats (*.BVH, *.FBX).
-
Press Ctrl + N to open new a project.
-
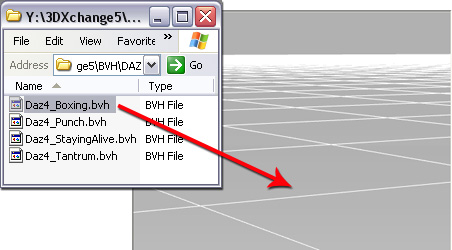
Load one of the human motion files in a group. If the
motion file contains no character mesh and bones (*.BVH),
then 3DXchange will automatically generate stick-shaped
meshes for better viewing.
-
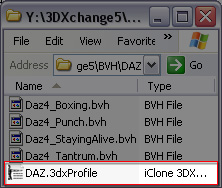
Characterize the motion and remember to
save the characterization profile, during characterization, for later use.
-
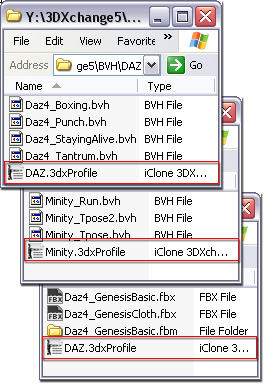
Repeat the last step on one of the files in the groups until each group has its own
custom Characterization Profile.
Step 2: Loading Multiple Human Motions
Once the environment is set, you may start to load multiple human motion files into the Motion Library of 3DXchange.
-
Make sure that there is a
characterized motion or a
characterized character in the 3D viewer.
-
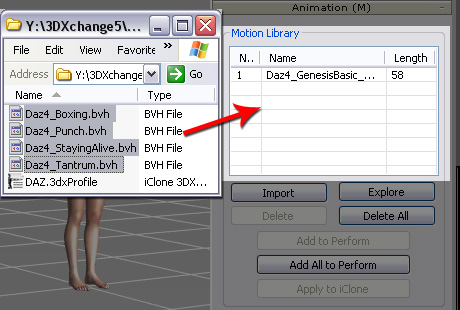
Select one or more human motion files in a group.
Drag and drop the motions into the Motion Library in the Animation section of 3DXchange.
-
You may encounter three situations, in accordance to the formats of the motions:
-
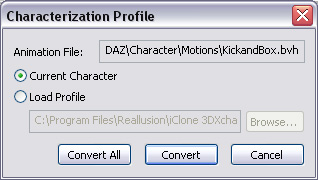
BVH motions or Non-human iMotions:
A pop-up message appears and asks you to characterize the motions.
-
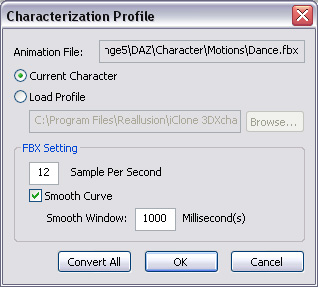
FBX motions: A pop-up message appears and asks you to
characterize
the motions and set the sampling method. Please refer to the
Animation Sampling Rate for more information.
-
Standard iMotions: The motion files are directly loaded into the the Motion Library.
-
Characterize the motions:
-
If the motions are in the same group as the current
characterized motion, then select the Current Character
radio button.
-
If the motions are from another 3D tool, then select the Load Profile radio button and
load the custom profile that you have saved in the previous section.
|
Note:
|
-
Please note that although you may use the embedded characterization profile, the result
is not
guaranteed because the lengths of the bones can be slightly different or adjusted. A custom saved
profile is preferred.
|
Step 3: Adding Motions to the Perform Editor and Exporting Motions
After loading the desired motions, you must add the motions to the Perform List because
3DXchange only exports the motions according to the Perform List status
instead of exporting them from the Motion Library.
(The Apply to iClone button in the Motion Library section merely applies the
highlighted motion to the selected character in iClone instead of exporting it as a single
motion file)
-
Add the desired motions to the Perform Editor by clicking the Add to Perform or
Add All to Perform buttons in the Motion Library section.
For more information, please refer to the
Using Perform Editor section.
-
Click the Export button (Shortcut: Ctrl + E) and modify the settings in the
Export Type section to
export the motions.

-
Click the OK button to export. The exported assets can be found in the following paths:
Motions:
-
Windows XP - C:\Documents and Settings\All Users\Documents\Reallusion\Custom\iClone 5 Custom\Motion\[Custom Name]\
-
Windows 7 or Above - C:\Users\Public\Documents\Reallusion\Custom\iClone 5 Custom\Motion\[Custom Name]\
Character:
-
Windows XP - C:\Documents and Settings\All Users\Documents\Reallusion\Custom\iClone 5 Custom\Character\
-
Windows 7 or Above - C:\Users\Public\Documents\Reallusion\Custom\iClone 5 Custom\Character\


