Click Avatar Creator Wizard
![]() to import a jpg, bmp or gif image. The
Select Face Photo dialog box appears.
to import a jpg, bmp or gif image. The
Select Face Photo dialog box appears.
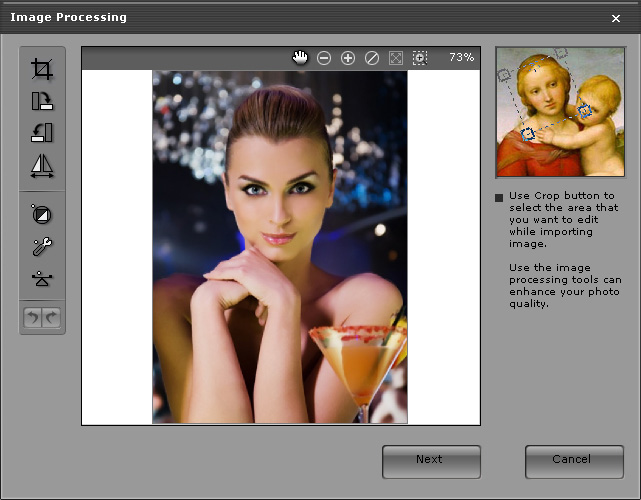
Use the tools on the left side of the image processing menu to adjust the area, quality, and color settings of the image as follows.
Click Crop Image
 to select only the required image area.
Drag a marquee across the image using the mouse to create a crop box.
Use the corner handles of the marquee to rotate the crop box.
Use the mouse to move the crop box across the image as desired.
Click
to select only the required image area.
Drag a marquee across the image using the mouse to create a crop box.
Use the corner handles of the marquee to rotate the crop box.
Use the mouse to move the crop box across the image as desired.
Click
 when done.
Click
when done.
Click
 to cancel the current crop box and restart.
Click Rotate CW
 or Rotate CCW
 to rotate the image by 90 degrees in the clockwise or counter clockwise direction.
Click Mirror
 to create a mirrored reflection of the image. This function is useful for images
obtained from scanners or cameras.
to create a mirrored reflection of the image. This function is useful for images
obtained from scanners or cameras.
Click Smart Level
 to adjust the color levels of the image automatically. CrazyTalk Cam Suite analyzes the
color levels and adjusts the brightness, contrast, hue, and saturation levels to
achieve optimum image quality.
to adjust the color levels of the image automatically. CrazyTalk Cam Suite analyzes the
color levels and adjusts the brightness, contrast, hue, and saturation levels to
achieve optimum image quality.
Click Color Level
 to adjust the brightness, contrast, hue, and saturation levels of the image
manually. Use the sliders in the menu box to adjust the values or enter the
numerical values for each parameter in the boxes next to the sliders.
to adjust the brightness, contrast, hue, and saturation levels of the image
manually. Use the sliders in the menu box to adjust the values or enter the
numerical values for each parameter in the boxes next to the sliders.
Click Color Balance
 to adjust the color balance manually. Drag the sliders to adjust the
Cyan - Red,
Magenta - Green, and
Yellow -Blue levels.
to adjust the color balance manually. Drag the sliders to adjust the
Cyan - Red,
Magenta - Green, and
Yellow -Blue levels.
Click Next button to move to the next step, Auto-Fit Anchor Points.