Loading Image
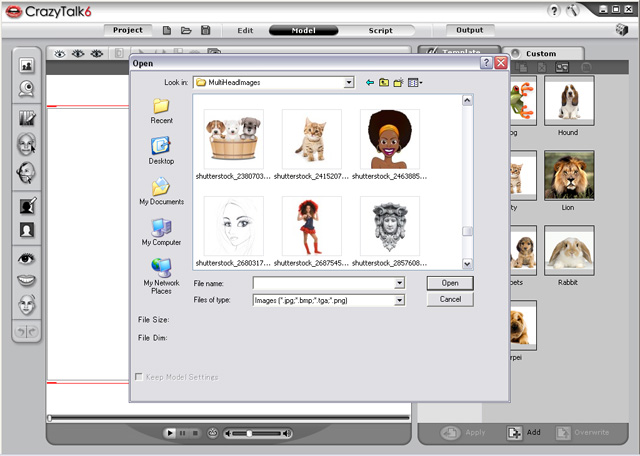
There are two ways to load your image:
 Import Image:
Click to import a jpg, bmp, tga or png file with one or more
faces to generate models.
 Camera Capture:
Click to take a picture with your web camera. Another panel will open for
capturing an image.

Cropping, Rotating and Enhancing Imported Image
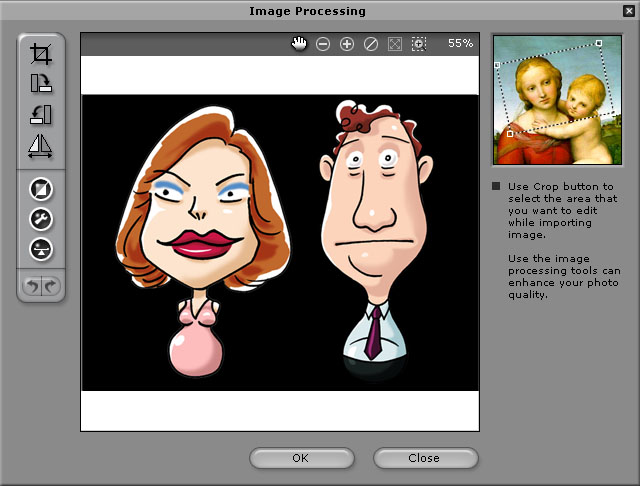
Image Processing is the first step of the wizard. You may also click
the Image Processing
 button to open the image processing tools
and enhance the image after exiting the wizard.
-
 Crop Image: Select the required image area.
-
 /
/
 Rotate CW /
Rotate CCW: Rotate the image by 90 degrees in the clockwise or counter-clockwise direction.
-
 Mirror: Mirror the image on the horizontal axis.
-
 Smart Level: Adjust the color levels of the image automatically.
-
 Color Level: Adjust the brightness, contrast, hue and saturation
levels of the image manually.
Use the sliders in the menu box to adjust the values or enter the numerical values for
each parameter in the boxes next to the sliders.
-
 Color Balance: Adjust the color balance manually.
Drag the sliders to adjust the Cyan - Red,
Magenta - Green, and Yellow -Blue levels.
Click Highlights to apply these color settings to emphasize the brighter areas.
Click Midtones to apply these color settings to the entire image with average
intensity.
Click Shadows to apply these color settings to emphasize the darker areas in
the image.
Face Fitting
The Face Fitting step is next. Click and move the indicators numbered 1, 2, 3, and 4 on the image to provide the four points
for the fitting process as displayed in the sample image. You may also click the
Face Fitting
 button to start the Face Fitting step again after exiting the wizard
to add or delete models.

Adjust the four points as close to the correct position as
possible to get the best fit for the eyes and mouth features.
If you merely want to have a single model in the project, please skip the following steps.
To generate multiple models (you may add up to four models):
-
Click the Add Model  button.
-
Drag on the image to select another character on the image. Please note that
the top left corner of the cursor is the base for framing out a model.

-
Locate the four feature points again to best fit the new model's eyes and mouth
features.
-
You may click on the target quadrilateral and click the Delete Model
 button to remove the model.

Click the OK button when you finish adding models and go to the next process.
(3D) Face Orientation
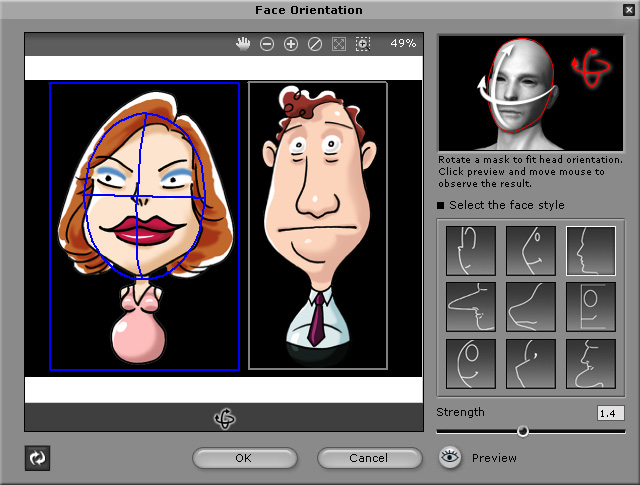
The Face Orientation step displays. Here you may assign different
face styles to every model by clicking the model on the image and then selecting a suitable style.
You may also click the Face Orientation
 button to invoke the Face Orientation step again after exiting the wizard
to re-assign different face styles to each model.
-
Utilize the  tool to
rotate the
oval wire to best fit the orientation of the face on the image.
Do not worry if the wire does not perfectly fit the face on the image since this panel
is only for deciding the rotation strength of the profile.
-
Strength: Drag the slider to adjust the movement strength of
the profile as the model rotates.
-
Preview: Toggle this button and move your mouse around to
see the effects of the Strength in the viewport. Toggle it again to leave the
Preview mode.
Click the OK button to exit the wizard and go back to the model page with the newly-generated models.
You may click the  ,
,
 , and
, and
 buttons on the Model
page to re-launch the panels above to change the settings.
Separating Models from Background
Click the Background Mask Editing
 button to modify the area of the image that
reveals the background image, which does not move along with the talking models.
If you load TGA or PNG images with alpha channel, the alpha channel will be automatically converted
into the Background Mask.

|
Note:
-
The background mask, also known as the alpha channel,
controls the transparency of TGA or PNG images.
-
The mask is defined by the blue area.
-
The mask does not actually show up on the model. It is for your reference only.
-
Please make sure the mask does not cover any model.
|
 Full: Extend the background mask over the complete image area.
 Clear: Delete the background mask.
 Inverse: Invert the background mask area. The area that was previously
defined as the background mask and the animated area are swapped.
 Paint: Paint on the image to enlarge the background
area or add more parts to it.
 Erase: Paint to erase parts of the background mask.
Brush Size: Drag the slider to adjust the size of the brush tool.
Mask Color: Click and specify the color for the background mask via the color palette.
Opacity: Drag the slider to specify the opacity of the background mask.
Contract/Expand: Drag the slider to contract or expand the background mask.
Blur: Drag the slider to blur the edges of the background mask.
 Preview: View the results of your editing.
Fine Tuning Face Fitting in Wireframe Mode
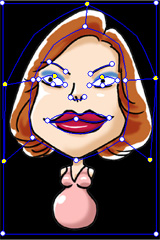
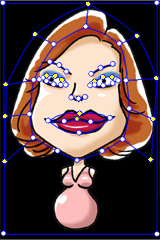
CrazyTalk automatically generates a wire-frame surrounding the face
according to the 4 points you set in the Face Fitting panel.
You may click Basic Facial Mode
 or Detailed Facial Mode
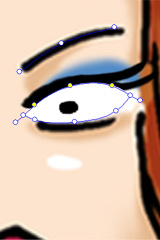
 to view the wire-frame. Drag the control points or the lines to
fit the character’s face much more precisely in these two modes.
Please also use the
 tools above the viewport to zoom in/out or pan the image to locate
the points more precisely.
|
|
|
|
Basic Facial Mode
|
Detailed Facial Mode
|
Zoom in for Editing
|
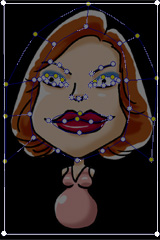
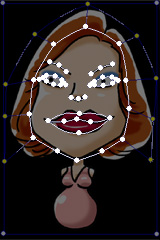
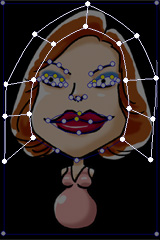
The wire-frame structure is divided into two parts, Character Frame and
Head Frame (includes Skull Mesh and
Hair Mesh).
Character Frame
|
Head Frame
|
|
Skull Mesh
|
Hair Mesh
|
|
|
|
|
The character frame decides the range on the image to generate a model.
Cover the whole body of the character
on the image with the character frame so the whole model can be transformed
in the timeline editor.
|
The skull mesh is used to frame out the skull, eyes, nose and mouth of the model.
The more proper the points are aligned, the better the facial animation the model presents.
|
The hair mesh, also known as Pharaoh mesh, is used to frame out objects attached to
the head such as hair, hat or long ears (of animals).
It prevents the image from breaking and increases the realism as the model rotates.
|
Defining Custom Background
Click the Background Settings  button to specify a solid color or an image as the
background.


The original look
|

Define the background area (blue area)
|

Scene image imported as the background.
|

Result
|
Specifying Virtual Eyes
Click the Eye Settings
 button to specify the settings for the Eyes.
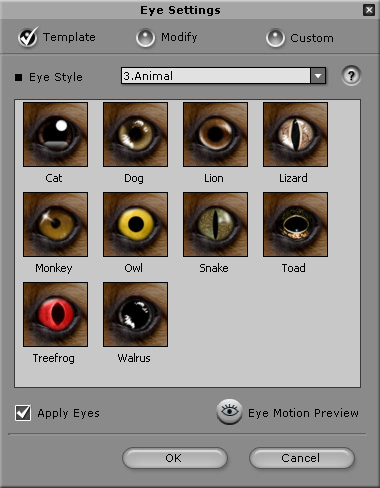
-
Select one of the eye templates from the Eye Style drop-down list.
-
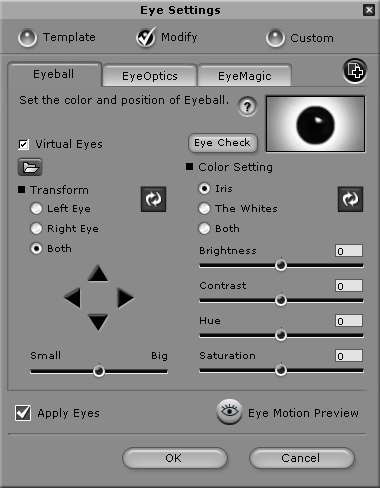
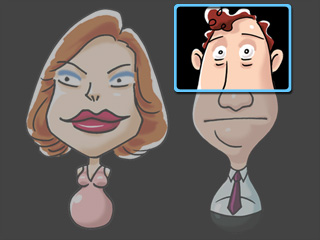
Click Modify. You may then adjust the position and the color
of the Eyeball, Eyelash, Eye Shadow as well as the
Specularity of the eyes.
|
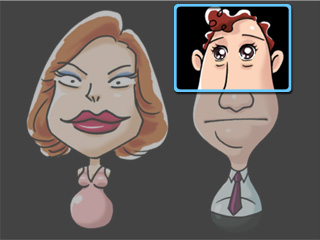
|
|
Before
|
After
|
You may also click the Import  button to import custom images (JPG, BMP, TGA, PNG,)
with or without alpha channel as the
texture of the character's Eyes (256 pixels x 256 pixels).
Specifying Virtual Teeth and Inner Mouth Color
Click the Mouth Settings
 button to specify the settings for the Teeth, Mouth and
Lips.
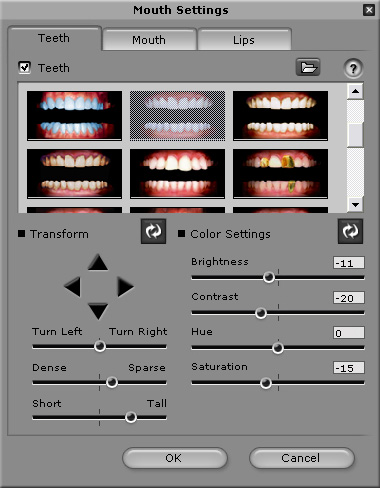

|
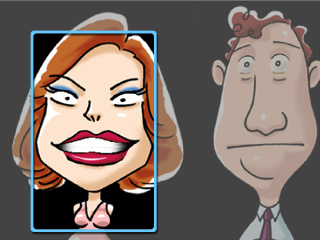
|
|
Before
|
After
|
You may also click the Import  button to import custom images (JPG, BMP, TGA, PNG,)
with or without alpha channel as the
texture of the model's Teeth (256 pixel x 166 pixels).
Assigning Standby Motions
Pick the model and click the Model Motion Settings
 button to assign different Standby Motions to individual models. The models'
head will
rotate when they are not speaking.

Import Image: Click to import a jpg, bmp, tga or png file with one or more faces to generate models.

Camera Capture: Click to take a picture with your web camera. Another panel will open for capturing an image.

 button to open the image processing tools
and enhance the image after exiting the wizard.

Crop Image: Select the required image area.
/
Rotate CW / Rotate CCW: Rotate the image by 90 degrees in the clockwise or counter-clockwise direction.
Mirror: Mirror the image on the horizontal axis.
Smart Level: Adjust the color levels of the image automatically.
Color Level: Adjust the brightness, contrast, hue and saturation levels of the image manually. Use the sliders in the menu box to adjust the values or enter the numerical values for each parameter in the boxes next to the sliders.
Color Balance: Adjust the color balance manually. Drag the sliders to adjust the Cyan - Red, Magenta - Green, and Yellow -Blue levels. Click Highlights to apply these color settings to emphasize the brighter areas. Click Midtones to apply these color settings to the entire image with average intensity. Click Shadows to apply these color settings to emphasize the darker areas in the image.
 button to start the Face Fitting step again after exiting the wizard
to add or delete models.

button.

button to remove the model.

 button to invoke the Face Orientation step again after exiting the wizard
to re-assign different face styles to each model.

tool to rotate the oval wire to best fit the orientation of the face on the image. Do not worry if the wire does not perfectly fit the face on the image since this panel is only for deciding the rotation strength of the profile.
,
, and
buttons on the Model page to re-launch the panels above to change the settings.
 button to modify the area of the image that
reveals the background image, which does not move along with the talking models.

 Full: Extend the background mask over the complete image area.
 Clear: Delete the background mask.
 Inverse: Invert the background mask area. The area that was previously
defined as the background mask and the animated area are swapped.
 Paint: Paint on the image to enlarge the background
area or add more parts to it.
 Erase: Paint to erase parts of the background mask.
 Preview: View the results of your editing.
 or Detailed Facial Mode
 to view the wire-frame. Drag the control points or the lines to
fit the character’s face much more precisely in these two modes.
 tools above the viewport to zoom in/out or pan the image to locate
the points more precisely.


 button to specify a solid color or an image as the
background.


 button to specify the settings for the Eyes.


 button to import custom images (JPG, BMP, TGA, PNG,)
with or without alpha channel as the
texture of the character's Eyes (256 pixels x 256 pixels).
 button to specify the settings for the Teeth, Mouth and
Lips.


 button to assign different Standby Motions to individual models. The models'
head will
rotate when they are not speaking.
